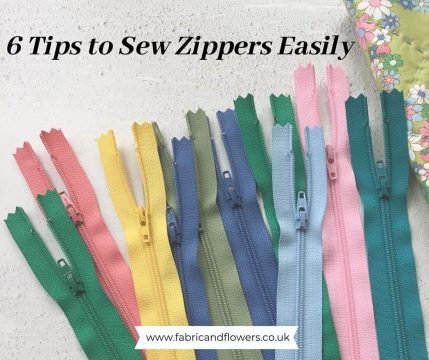
6 Tips – How to Sew Zippers Easily and Quickly
When I first started sewing, I loved the idea of sewing zippers but was scared of actually doing it! And it seemed to be one of those things that lots of other sewists mentioned as being horrible which made it feel like an even more impossible task!
Today, I would like to share with you all the tips and tricks I have learnt over the years because actually, zippers are nowhere near as scary as I thought and there are so many fun projects to be made!
NOTE: This post may contain affiliate links, which means if you make a purchase I may make a small commission at no extra cost to you. You can read my full disclosure privacy policy here. Thank you.
Feel the zipper fear, and do it anyway!
When I first started contemplating sewing with zippers, the main worries I had were;
- How do I sew the zipper in place when there’s a big ol’ metal pull that keeps pushing the sewing machine foot away?
- Am I going to damage my machine by sewing over something I shouldn’t?
- How am I meant to control the zipper when it’s been unzipped and is all flimsy and flexible?
And the honest truth is that yes! I have sometimes broken a needle on my machine. However, by following these steps this shouldn’t happen to you and you’ll be making lots of pouches and bags before you know it!
These tips will work best with regular, nylon zips for craft/home decorating projects (rather than dressmaking where you often need to use specifically sized zips) although many of the techniques are transferable.
If you are looking to buy some zippers, I use this shop as it has the most amazing range of colours and zip sizes available!
Table of Contents
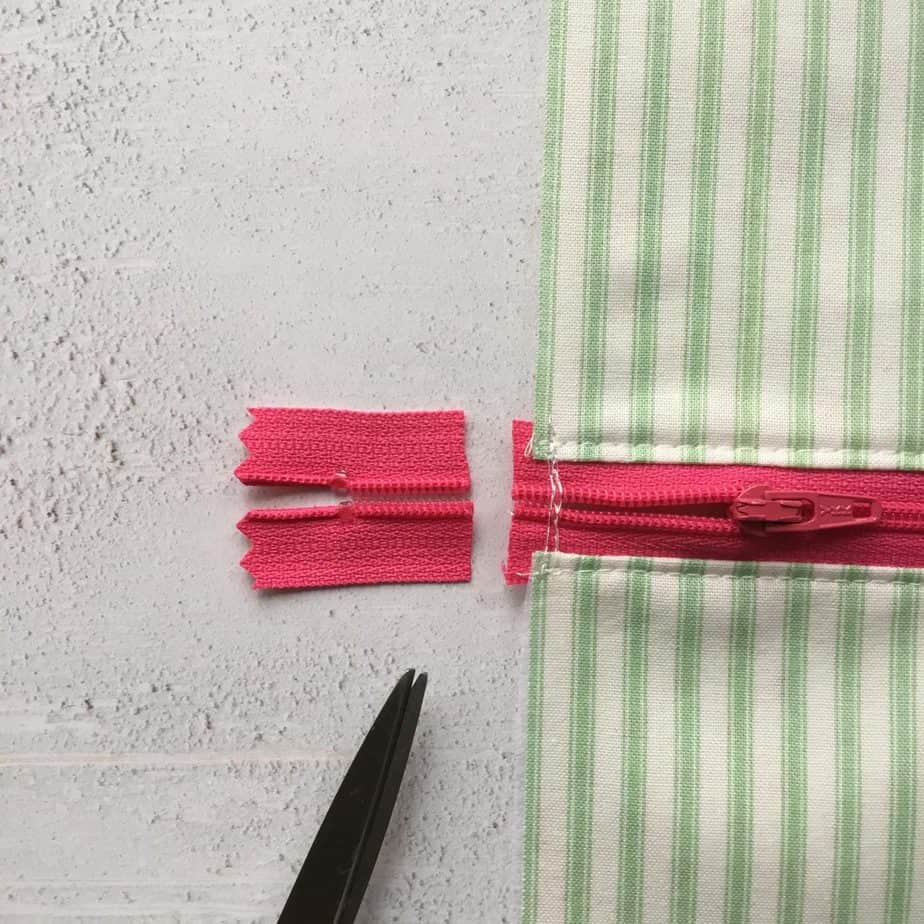
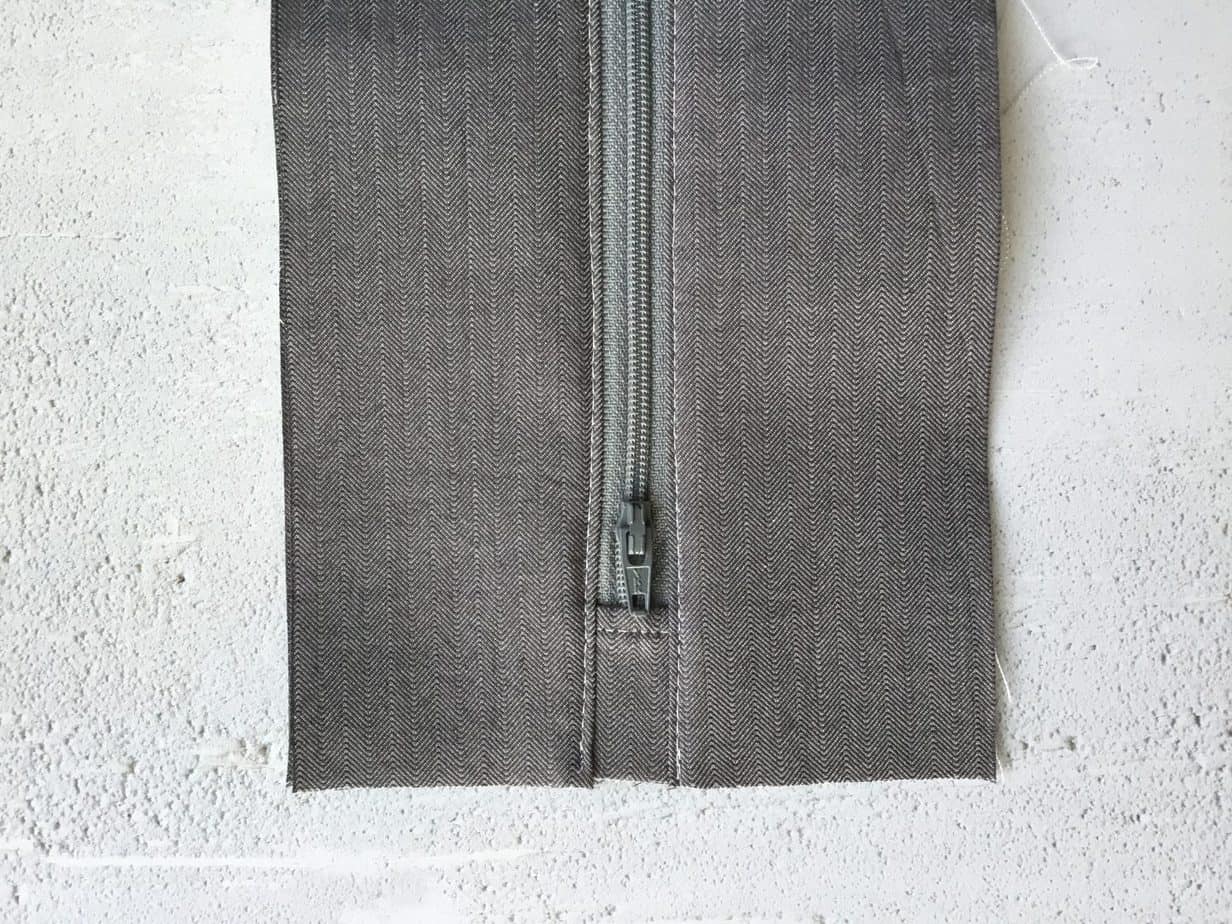
1. Use a Zipper that is too Long
When you buy zippers, it can be a bit confusing to know which bit to measure! When a pattern asks for a 7″ zipper, this refers to the length of the teeth from beginning to end not the total length of the tape.
By using a zipper that is too long for your project, the zip will overhang the material.
This allows you to leave the zip closed whilst sewing in both sides. This makes the zip a lot more stable to sew in, as the zip pull does not get in the way and you do not need to worry about moving it past the zipper foot mid-sewing.


Once the zip is sewn in place, move the zip in towards the centre of the zip. I find it helpful to stitch across both ends of the zip (within the seam allowance) either by hand or with a machine to stop the zip being pulled off accidentally.
Alternatively, you can use a safety pin to keep the ends together.
Finally, trim the zip to size (do not use fabric scissors for this job!) and the raw edges of the zipper will be eventually be hidden in the seam allowance.
Note: do not try this with metal zips as they can not be trimmed so easily, and will damage your scissors!
Great tutorials to try this technique with are;
- Boxy Pouch – Pink x Stitches
- Dumpling Pouch – Michelle Patterns
- Neat Boxy Pouch – fabric & flowers
- Lapped Zipper Cushion – fabric & flowers
2. Add Zipper Tabs to the End
Depending on the pattern, you can add tabs to one or both ends of the zipper.
If you add a tab at both ends, it helps to stabilise the zip so that even when unzipped, it is less flimsy making it easier to sew.
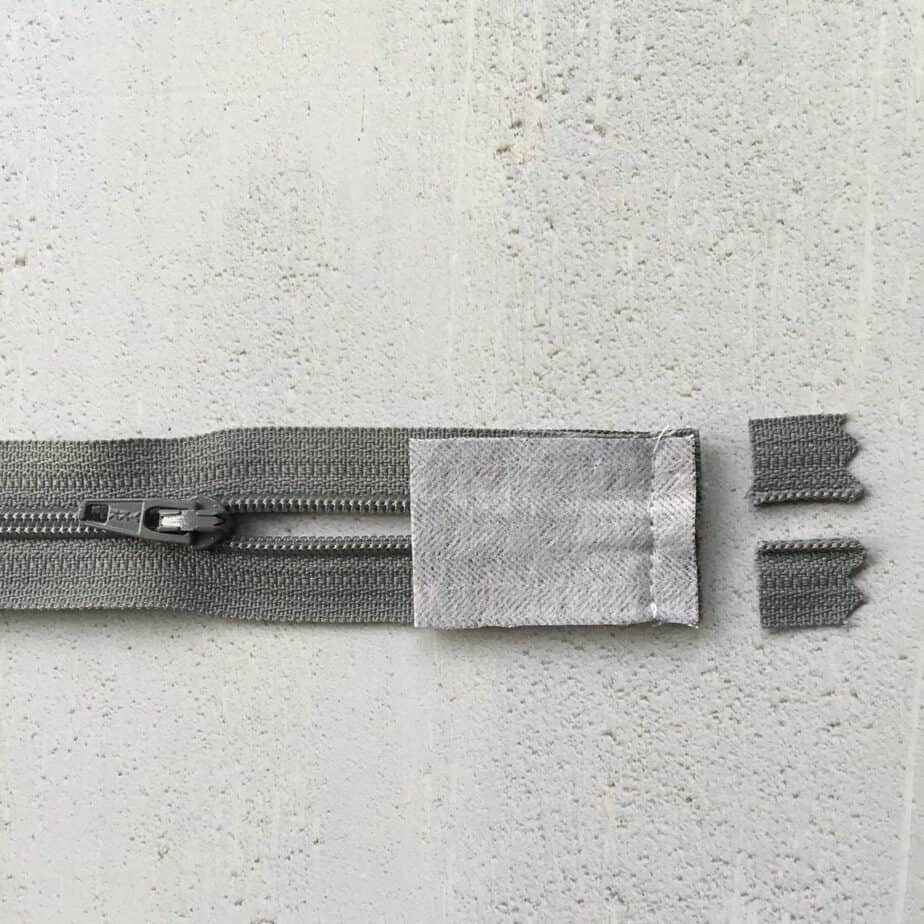

This is one of my favourite ways of adding a zipper tab as it removes all the bulk from the end of the zip, making it easier to finish projects off neatly.
Good tutorials to try this technique with, in combination with a longer zipper are;
- Lined Zippered Pouch – Flossie Teacakes
- Open Wide Zippered Pouch – Noodlehead
3. Use a Zipper foot
Most sewing machines will come with a zipper foot and this really does help to make the whole job a lot easier!
On some machines, you will need to move the foot to position the needle to the left or the right. On others, you can reposition the needle (see my post here for details).
It is worth familiarising yourself with the zipper foot and knowing which part of the foot to align with the fabric for 1/4″ seam allowance and for topstitching.
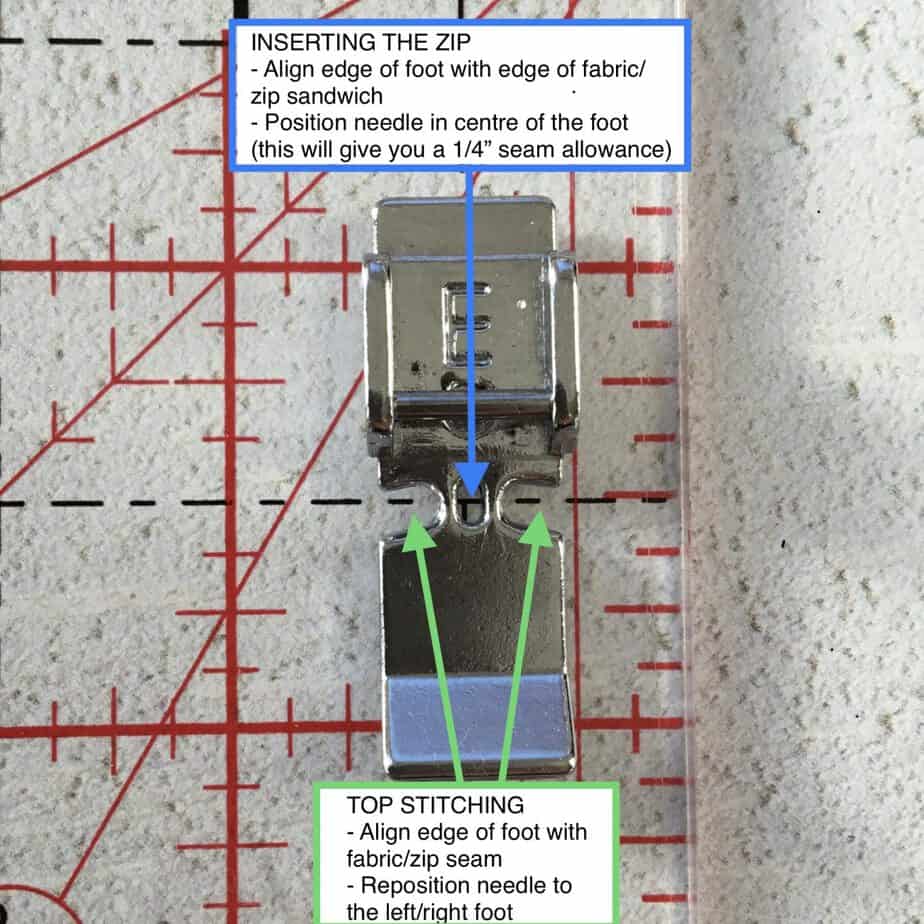
For example, with my machine (a Janome Horizon), I keep the needle in the central position for sewing the zipper in position, aligning the edge of the foot with the edge of the fabric.
When I’m top-stitching, I like to shift the needle position (to whichever side I’ve edge matched), normally to a 1.5 (left side) or 7.5 (right side) so that the stitching is close to the fabric/zip seam.
4. Positioning the zipper
I always like to align my fabrics first, before sandwiching the zipper between them. Others prefer to layer fabric, zip, fabric. I would try both ways to find what works for you and gives the best result.
Personally, I find that by layering my fabrics first (especially if I’m making a quilted pouch and have got the additional wadding layers), I can put a pin along the top edge to make sure that the fabrics stay aligned whilst I’m positioning the zipper.


I normally only use one pin to hold the zip in position – near the top of the seam – always inserted at a right angle to the fabric.
Sometimes, I will use wonder-clips to keep the layers together, depending on what fabric I’m using.
Once I’ve secured the zipper in position with a few stitches, I will remove the pin and sew the entire zip, readjusting the zipper tape as needed.
TIP – always make sure that the needle position is down if you stop stitching mid-zip to rearrange the fabrics/reposition the zip pull!
5. Sew Both Sides from the Same End
When I discovered this trick, it was a game-changer! Always sew each side of the zip from the same end eg. from the bottom/top of the zip.
This means that if there is any fabric/zip creep, it will all go in the same direction, and you shouldn’t end up with any misaligned fabrics/zips.
If you combine this with the next tip (marking the zipper), you should nearly always have perfect zips (I say nearly, because there will always be one that won’t behave!).
6. Mark the zipper
Finally, I like to mark my zipper.
The first side is sewn in as described above. However, before sewing the second side in, I like to transfer the beginning and end of the zip/fabric on the first side over.

To do this, you can either fold the zip in half or lay it flat. Mark the starting/end position of the fabric with either a pin or pencil (making sure that the mark is within the seam allowance).
Use this mark to match the outer and lining fabrics on the zip.
Start stitching from the same end as for the previous side and sew along the seam – keeping the fabric under tension if needed until you reach the end.

And there we are! All my top tips for sewing in zips. I hope you’ve found it useful?!
If you’re looking to try some different projects, please do check out my zippy patterns for the (Not So) Little Zippy Pouch and Flexi Sewing Case which make great project bags for sewing on the go.
Don’t forget to check out this shop for an amazing range of zippers!
And do let me know if you have any questions or tips that you can share,
S x
Today’s sky::: mostly grey with a fair bit of rain. Autumn has arrived!!!
If you would like monthly news and updates, please sign-up to my newsletter.
To check out my quilt and accessories patterns, visit my Pattern shop.
For my favourite sewing equipment and tools, visit my Amazon store.