
Tutorial – the Stash’n’Go drawstring bag
Hello there! I’ve been away for a few days but have put together a circular drawstring bag tutorial which I’m calling the

NOTE: This post may contain affiliate links, which means if you make a purchase I may make a small commission at no extra cost to you. You can read my full disclosure privacy policy here. Thank you.
I was inspired to make these after seeing some of the nifty drawstring make-up bags on the web – often called lay and go make-up bags. I love that it opens up to lay completely flat allowing you to see everything!
This handy 9-page pack includes a planner, project organiser, gift tags and care labels that you can print out as many times as you need!
I’ve used a waterproof lining to protect it against any spillages and it can be chucked through a washing machine with ease!
I think it could be used in so many different ways though – carrying around toys/snacks for a young child (this would have been so useful when my kids were little and I was looking for a clean surface for them to eat off of!!!!) or maybe even a project bag for some sewing or knitting?!
If you enjoy this project and would like an ad-free version, you can buy a PDF download of the pattern including instructions for a Mini version, at a nominal price.
So, shall we get on with how to make one…….
Table of Contents
Materials
- 1 FQ for the Outer
- 1 FQ of wadding
- 1 FQ for the lining (I used ripstop which you can get in lots of fun designs)
- 1 FQ for the cord casing
- Cord – I used paracord available here and here
- Cord Stoppers – available here and here and in lots of different colours!
Finished Size: 17″ diameter

Stash’n’Go Bag PDF Pattern
Includes full-size templates, step-by-step instructions and a mini version.
Make a Template
To start with, I made a template as I knew I wanted to make a few of these!
I used an empty cereal box and, using a tape, measured 8.5″ from the corner up one straight edge. I then moved the outside edge of the measuring tape towards the other straight edge marking 8.5″ dashes at regular intervals. Join the marks to create an 8.5″ wide quarter circle. Cut out.


Preparing your Fabrics
Use the template to cut out (1) outer fabric and (1) lining.
Fold the fabric in half, and then half again. Place the template on top, matching the straight edges with the folded edges of the fabric.

TIP: if you are using ripstop, it can be quite slippery. After making a few of these bags, I have found that using wonder clips to secure the template to the ripstop in place gave a better result.
For the cord casing, open out the FQ and press. The casing needs to be cut on the bias so that it will curve around the edge of the bag. To do this, cut a straight line at a 45* angle to the selvedge. Cut three (3) strips 2″ wide.


- Take two (2) strips and place the ends right side together. Sew. Repeat for the other strip. Press the seams open.
- Fold the casing wrong sides together, matching the long edges. Press.
- Square off one end and cut the folded strip to a finished size of 54″.
Making the Bag
Lay the outer fabric wrong side down on to the wadding and quilt as desired, I went for random wavy lines. Trim any excess wadding.
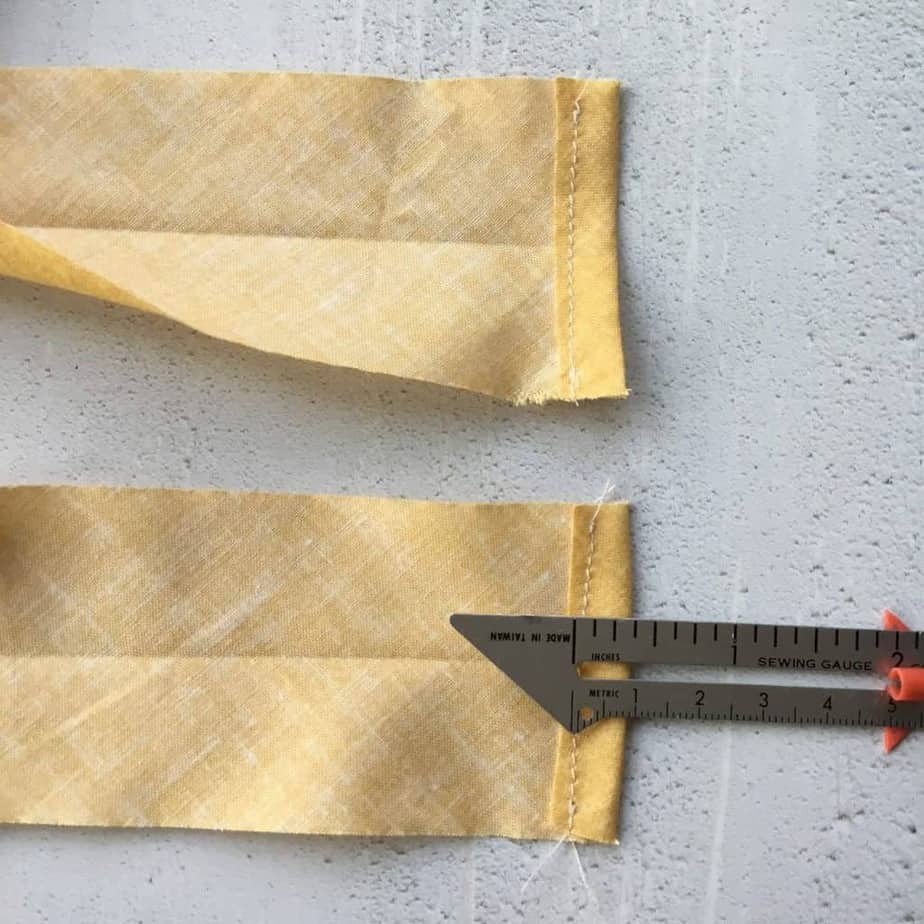
Take the cord casing and lay it right side down in front of you. Fold one end back (wrong sides together) by 3/8″ to create a hem and stitch. Repeat at the other end.
Fold in half and place a pin on the central point. Fold in half again and place a pin so that you now have four quarters marked on your casing.

Take the outer bag piece and fold in half, marking each side with a pin. Open out and then fold the pins together to match, placing a pin in the fold on each side again.
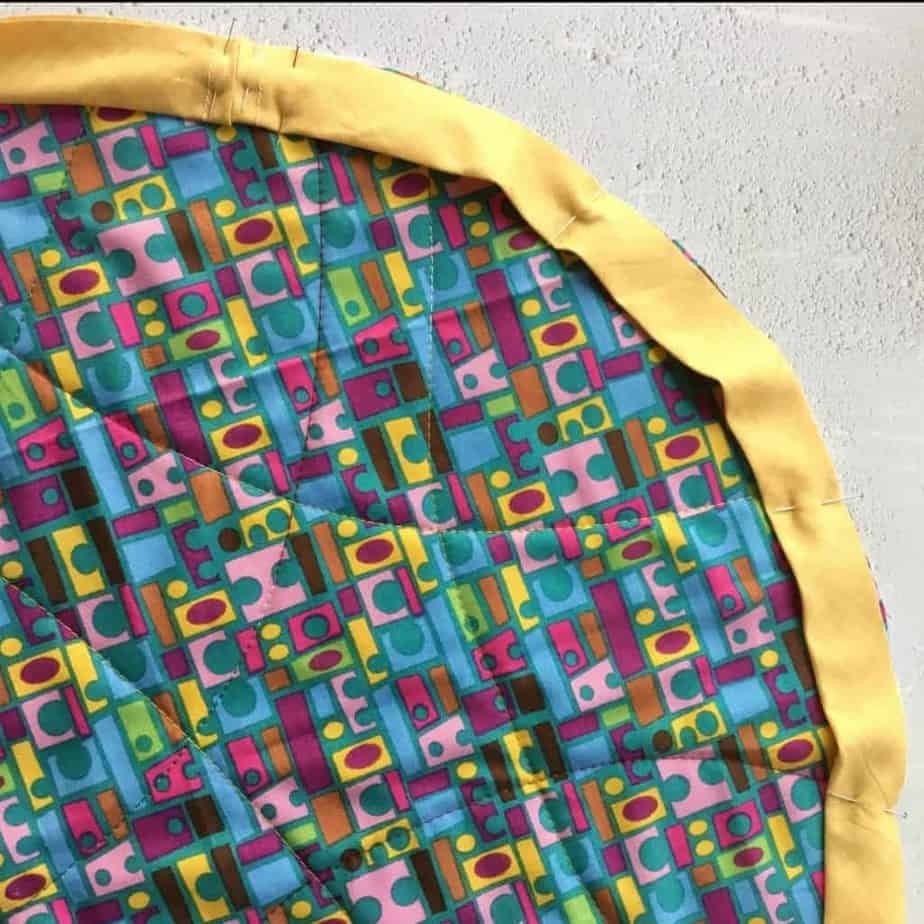
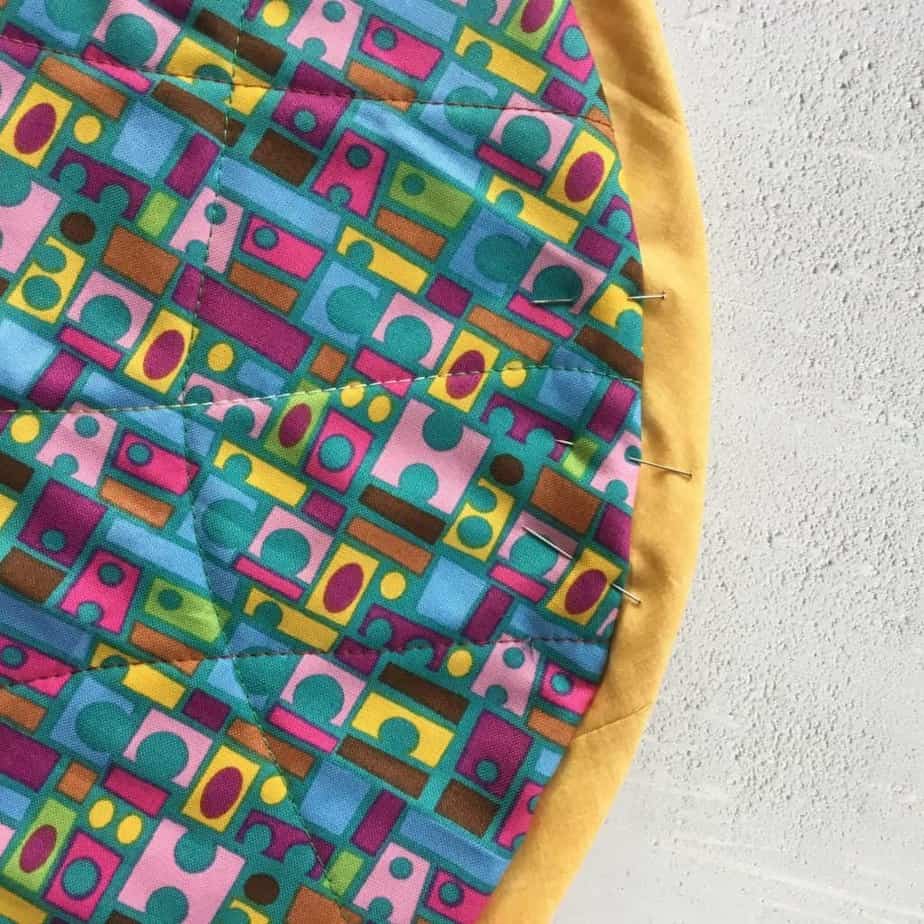
Place the casing on the right side of the bag outer and pin in place matching the quarter marks of the circle with the quarter marks on the cord casing, and the raw edges of the casing with the raw edge of the circle. Add extra pins if you would like. Sew around the circumference of the bag using a 1/8″ seam allowance.

Place the lining fabric right sides facing with the outer panel. If you are using ripstop, use clover clips to prevent marking of the fabric and secure in a few places.
Start sewing, securing the beginning stitches and using a 1/4″ seam allowance, around the edge of the bag. Stop when you are 3-4″ from where you started, leaving a gap for turning.

Pull the bag through the opening until it is the right way out. On the outer side of the bag, tuck the raw edge inside the bag following the curve and pin in place (I don’t go through the lining so as to avoid pin marks on the ripstop).

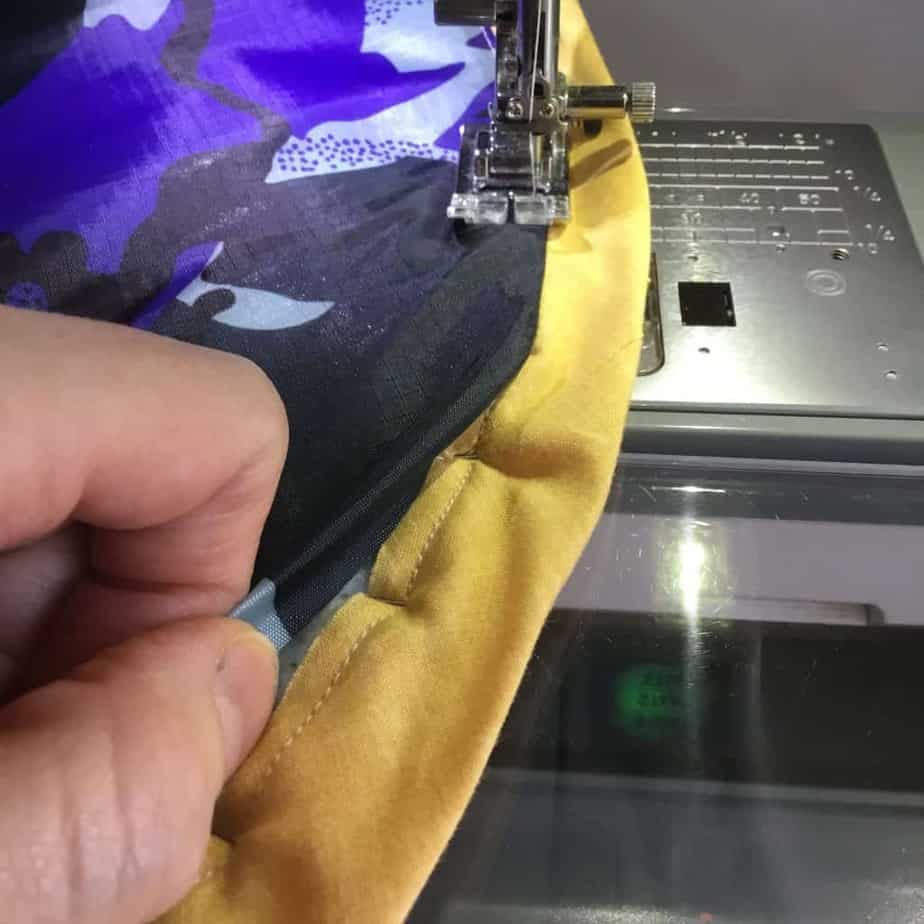
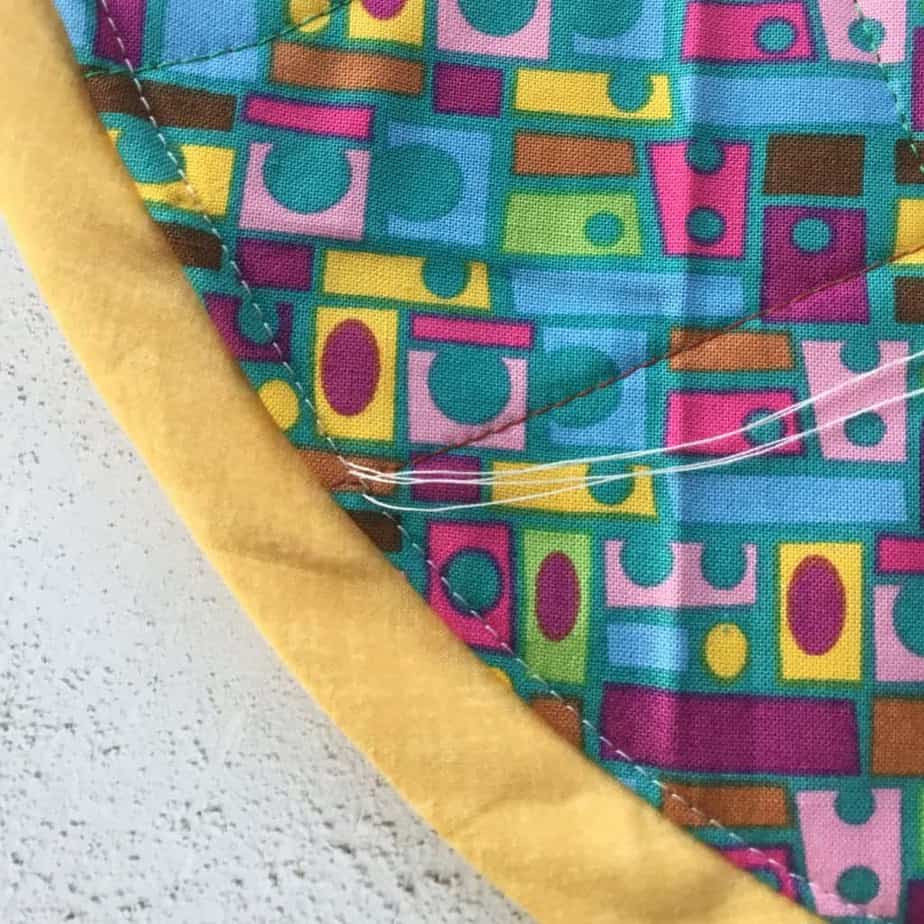
Place the bag lining side up, and begin top-stitching around the edge – I like to start just after the opening and leave long thread tails so that I can knot and bury the threads. If you take it slowly and pull the casing slightly as you work your way around the edge, you will get a lovely neat finish.

When you reach the turning-out gap, gently fold the raw edge of the lining under and stitch in place. Stop when you have completed stitching all around the bag. I like to pull the threads through to the front of the bag, knot and then bury the threads in the wadding.

Take the length of cord and trim to around 55″ – you may need to burn the ends to seal the threads and stop them unravelling. Place a safety pin through the cord close to one end, and begin to feed it through the casing.

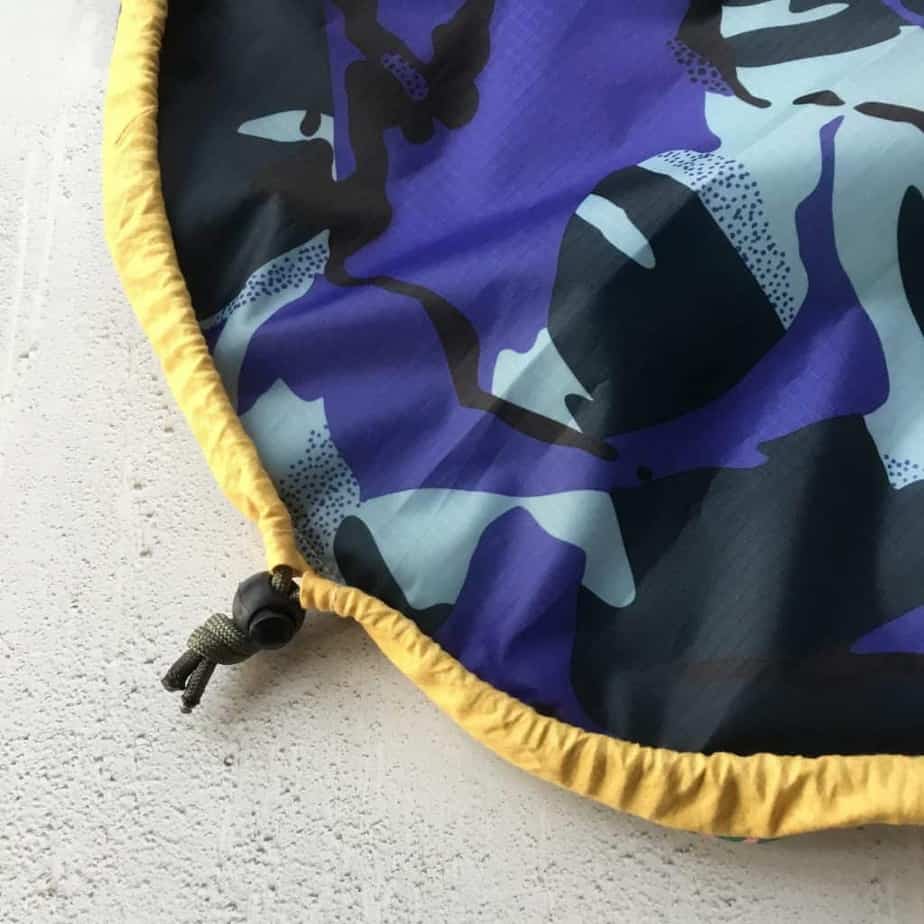
Once the safety pin has been threaded all the way through the casing, feed the cord gently through a cord-stopper. I find it easier to thread through each end individually. Tie a knot with the two cord ends to prevent the cord stopper

To use the bag, pull the cords to gather it up, and the cord stopper to keep it closed. It will become easier to gather/open with continued use.

These are quite quick to whip up – only a couple of hours – and

I recently made a Mini Stash’n’Go bag – ‘cos everything is cute smaller, right?! You can find the instructions and details of how to make one included in the ad-free Stash’n’Go PDF pattern.
If you do make one of these, I’d love if you could use the hashtag #stashngobag so that I can see what you’ve made. Don’t forget, you can check out my other tutorials here!
If you’ve enjoyed this tutorial, go and check out the free Neat Boxy Pouch which also makes an ideal present to gift!
Back soon,
S x
Today’s sky::: mostly grey and very cold!!!
If you would like monthly news and updates, please sign-up to my newsletter.
To check out my quilt and accessories patterns, visit my Pattern shop.
For my favourite sewing equipment and tools, visit my Amazon store.


Someone today asked me for a bag to put “used doggy poop bags” in while out walking and no bins around.
Something like this would be great..
Thanks for the perfect idea
Fantastic! Cheery fabric is definitely the way to go! So pleased you had fun sewing it x
Thank you so much!! I am tired of digging through my make-up bag each morning so I made this today. I probably spent way too much time picking out the perfect cheery fabric, but now I know I’ll love using it each day.
Hi Dora!
What a lovely gift – can’t wait to see how it will look with the extras, they’ll make it even more useful!!!
S x
Hi Ceri,
Thanks for getting in touch. If you are using this pattern tutorial just to hand-make a few that will be okay – please just make sure that you credit the pattern.
Many thanks,
Sonia
Hi Sonia , I’ve been planning on doing these this year for Xmas also but I’m adding two zipper pockets inside of mine and a carry handle besides the flap cover and Velcro cover closer! Your tutorial is very nice instructions also! Thank you Dora Goforth
Hi
Is this pattern able to be used to make them to sell – not on a large scale just locally
Thanks
Hi there Cath! I tend to use scraps of wadding that I have lying around, which are normally 80/20 Hobbs Batting. I’m not sure how thick it is, maybe a 1/4″? I hope that helps, let me know if you have any other questions! Thanks x
Hi I’ve just bought a similar bag off eBay and it’s very cheap looking and now I’ve seen this I’m going to give it a go. I like the wadding idea . Can I ask what type of wadding and the thickness of it ?
Ah, thanks Marilyn. So pleased that it’s useful for you! I prefer written instructions too, but there are lots that prefer visual….I try and include lots of photo’s as a compromise! Happy stitching!!!
Thanks so much, Sonya! This is exactly what I need to make for Christmas presents, especially for my friends in a charity quilt group. I visualize mine being filled with thread, bobbins, etc. Other sites have videos only; I really appreciate having the written tutorial.