#QuiltingTheory – How a quilt is put together
So, if you’ve read through the #QuiltingTheory series so far, you hopefully now understand the quilting language, why seam allowance is important (and how to find it on your machine!), how to buy and use quilting fabrics and what tools you need. Hurrah! So, how do we put all this knowledge together to layer a quilt and make it into a quilted project?!
NOTE: This post may contain affiliate links, which means if you make a purchase I may make a small commission at no extra cost to you. You can read my full disclosure privacy policy here. Thank you.
This post takes you through everything from the layers that make up a quilt, all about wadding and
Table of Contents
The Layers of a Quilt
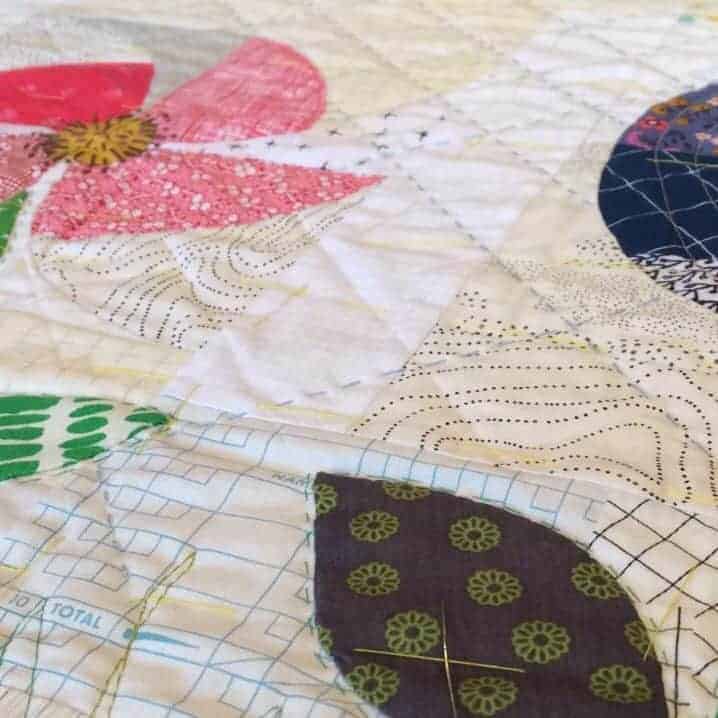
Quilts generally consist of three layers: a pieced top, an insulating fabric, and backing fabric.
A two-layer quilt can be made using something like fleece/minky to replace the insulation and backing fabrics. I’ve made a few quilts like this now and they are a fun alternative, and make great kids quilts because they are so tactile!
Wadding (or batting, depending on whether you are British or American!) is most often used as the insulating layer. There are lots of options available with different sizes, material content and weight, all of which
Loft refers to the thickness/heaviness of the wadding – the more loft you have, the puffier the quilt and the trickier it can be to stitch. A higher loft often makes a warmer quilt and can show off stitch definition!
Types of Wadding
Generally, it is recommended to use a wadding made from natural materials (or is a blended material with a high % of natural fibres) for warmth, comfort and longevity.
Each quilter will have their own preferred wadding. Some may use a few different ones depending on the project eg. a firmer wadding for wall hangings and thicker for a warm blanket.

Wadding is available in lots of different fibre contents,
- Polyester: available in a wide range of weights and amongst the cheapest waddings that you can buy. They are non-allergenic and wash well but being a man-made fibre are highly flammable and non-breathable. It has a tendency to be ‘puffy’ which makes it difficult to handle, particularly when machine quilting. I used it for my first few quilts but much prefer working with natural fibres.
- Natural Fibres: natural fibres have the benefit of being breathable. With washing and age, the fibres will experience some shrinkage which gives a quilt its’ used and crinkled look.
- Cotton: good for washing and easy to care for.
- Wool: a great insulator that can help to regulate body heat. However, it is a material that needs to be looked after carefully: too much agitation or washing at high temperatures could result in a lot of shrinkage/felting of the fibres.
- Bamboo: very soft and with anti-bacterial properties. Just like wool, it’s breathable helping to keep you warm in the winter and cool in the summer.
- Silk: very soft, lightweight, silky wadding that is perfect for a very special quilt or clothes. It is very luxurious so not generally used for everyday projects!
- Blends: there are many different material blends that are available. My personal favourite is a Hobbs 80/20 Cotton/Poly blend. It has a lovely weight, stitches through beautifully as well as showing stitch definition.
- Recycled/Green: with the current environmental concerns, there are now waddings available made from recycled materials such as plastic bottles – you can read my experience here of using it.
- There are also a couple of ‘speciality’ products available;
- Black Wadding: ideal for projects where only dark fabrics have been used.
- Fusible Wadding: one side is coated with a glue which is heat activated when ironed. Very useful when you don’t want to do lots of quilting and for bag/pouch making as it helps give added structure.
Each of these
If you are unsure of which wadding to try, it is worthwhile popping along to a local quilt shop if you have one. Alternatively, many companies offer wadding sample packs which can be a useful reference to all the different types of wadding available.
Buying Wadding
Wadding can be bought in pre-cut ‘quilt’ sizes (for example, baby quilt), by the metre or by the roll.
When starting out, I would recommend buying a piece of wadding big enough for your project, plus a little bit extra.
However, if you start doing a lot of quilting, it is worthwhile buying a roll. It is quite an investment, and storing it can be interesting (mine sits on top of a unit!) but it is lovely being able to just cut off whatever you need – although it is a little disappointing when it finally runs out!
Putting the Quilt Layers Together
Assembling the three layers of a quilt is often called basting or making a quilt sandwich. There are some people that really enjoy this process, but I confess that I am not one of them!
The biggest problems with layering a quilt can be having the floor space to do so. In my current house, I have a tiled floor where I can make enough space for most quilts, it’s only on the odd occasion that I need to move furniture. It’s also handy as I can use the edge of the tiles as a guide for laying out the fabrics and waddings!
In a previous house, this was not the case though. After a bit of trial and error, I found the best way to baste a quilt on a carpet was to;
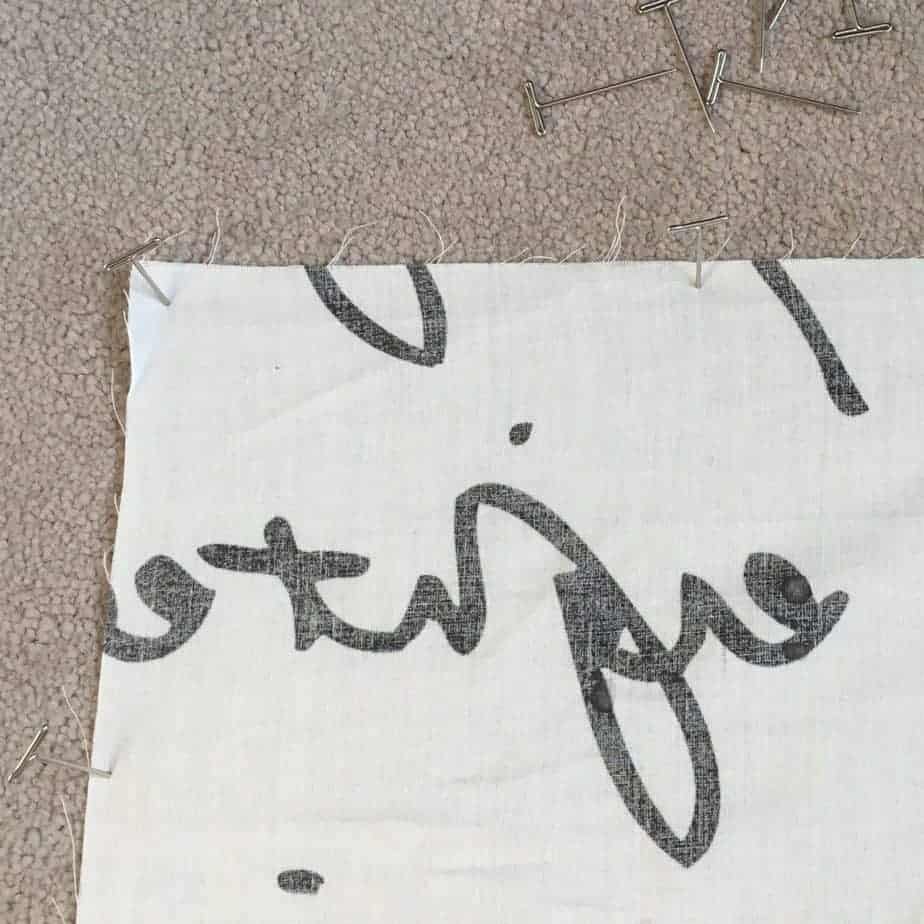

Secure backing fabric 
Layering the wadding 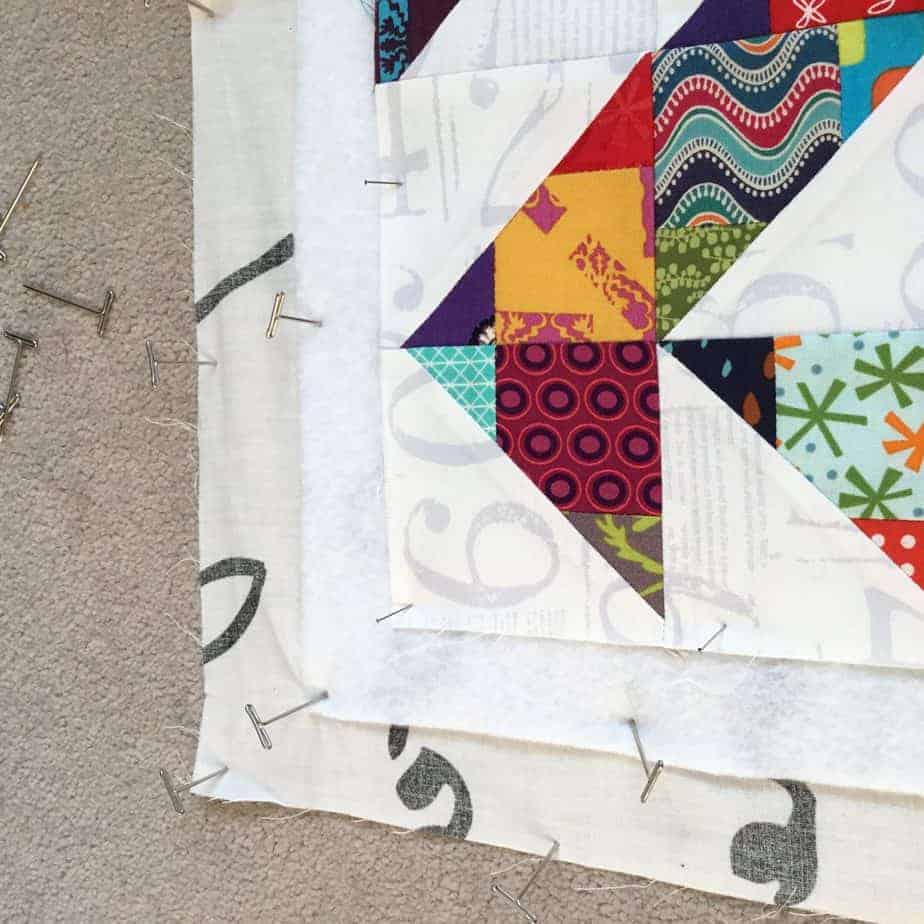
Smoothing out quilt top
- Smooth the quilt backing right side down directly on to the carpet and secure with T-pins pushed in at an angle (just as if I was blocking some knitting!).
- Repeat this with the remaining batting and quilt top (right side up) layers. I often use normal pins at this stage, as they are a little finer so less likely to damage the material.
The main methods for securing the quilt layers together are;
- Pin Basting: Pinning through all three layers using specialised curved pins to secure them together before stitching. Pins should be placed approximately 5″ apart. On a big quilt this can be quite a lengthy process and painful on the knees and the fingers!
- Spray Basting: an aerosol spray glue, normally on to the
wadding and then smoothing the fabric down. The fabric can be rearranged if it’s not in the right position the first time. Problems with this method can be the smell (it’s best to do in a ventilated room), the layers not sticking together properly and the flooring being quite tacky at the end of the process (and not that easy to clean!). I’ve also read that it is not recommended for projects that are not going to be washed as there is a risk that the glue could discolour the fabrics over time if not removed. - Thread Basting: hand-stitching the quilt layers together. If you are planning on hand-quilting a big quilt, this is a good method for securing the layers together for a long period of time without damaging the quilt. I have tried this method a few times and quite enjoy it, but it can hurt your fingers!
For an excellent tutorial on pin and spray basting, Suzy Quilts has a great post, which covers all the steps that I follow too!
For a Thread Basting tutorial, see the Quilting Hub for lots of detail.
Different Quilting Techniques

Free Motion, Echo and Hand Quilting 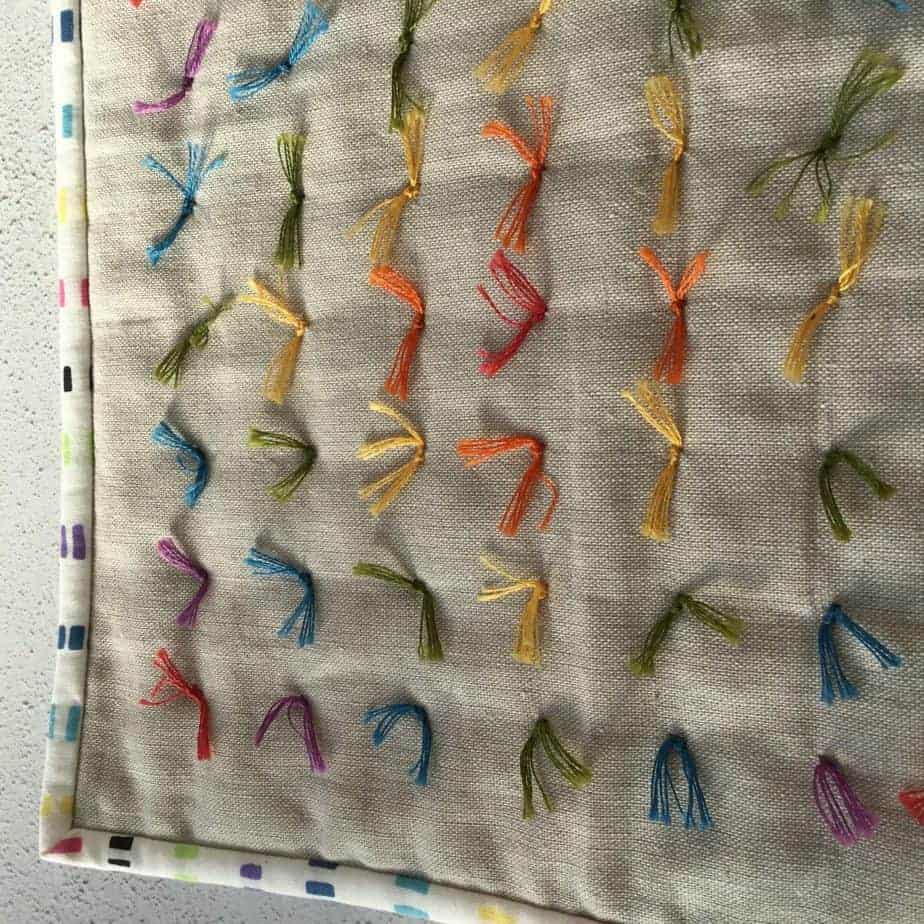
Tied Quilting
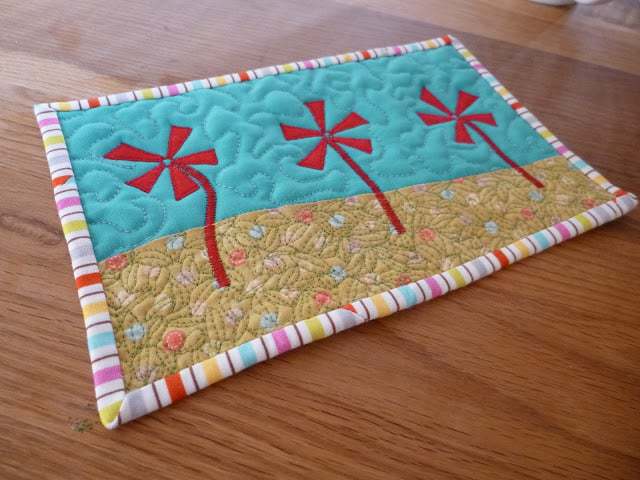
Once a quilt has been layered and basted, there is now the fun job of stitching the layers together. This subject is worthy of it’s own blog post, and is something that I am constantly trying to improve. Broadly though, this falls in to three categories
- Machine: using a sewing machine to stitch patterns – this can be straight lines, echo and Free Motion Quilting.
- Hand Stitching: using a thicker cotton or
perle thread to add hand stitches, straight line or decorative. - Tied/knotted: a traditional way of finishing quilts. This is a great way of securing the layers together quickly as well as adding great texture. This is normally achieved with a double surgeons knot;


Trouble Shooting Common Problems when you Start Quilting
At some point on your journey, something will probably go wrong during the quilting stage.
I’ve had a few disasters in my time, the worst one was when I spent a whole day quilting a top only to then have to spend the next two days unpicking it!!! There were tears of frustration, I can tell you!
So, to try and help you from going through
- Not cutting the wadding and backing fabric big enough: always cut the wadding BIGGER than the quilt top c. 4″ in each direction (so that there is a 2″ overhang) and the quilt back BIGGER than the wadding by c. 4″ in each direction. This allows for the inevitable shifting that will happen whilst quilting.
- Basting: the layers were smoothed out at different tensions meaning that they each bounce back differently when you remove the quilt from the floor (or wherever you basted it!). This can result in wrinkling between the layers, making it difficult to achieve a smooth finish. This is something that improves with practice and can also vary depending on which wadding is being used.
- Fabric shifting: one of the most frustrating things is when the stitching is looking good on the top layer, and then you turn the quilt over only to realise that the back has lots of puckers in it. However, there are a few things you can do to try and minimise this;
- Use a walking foot: a walking foot is a special attachment for the sewing machine which helps to feed the top and bottom layers through at the same time! The walking foot grips the fabric at the top at the same time as the feed dogs (the ‘teeth’ under the foot) grip the bottom of the quilt, helping to hold the layers together as the quilt is fed through.
- Always start from the same side of the quilt eg. top and sew in the same direction. This means that if there is any fabric shifting, it is all going in the same direction, reducing the likelihood of puckering.
- Start from the middle of the quilt and work to the outside edges. This means that if there is any fabric shifting it is all moving to the outside of the quilt, rather than bunching up towards the centre.
- Wadding showing/bearding: wadding can start coming through where the needle has pierced the fabric.
- Ensure that the wadding is suitable for your project. Inspect the wadding to see if there is a front or back and make sure that it is placed the right way in the quilt.
- Ideally, use a new needle at start quilting a new project, especially for machine quilting. As the needle blunts, the likelihood of it dragging wadding fibres through the fabric increases.
And most importantly, don’t forget to have fun and experiment!
Phew! Another long post! I think that’s covered all the main things you need to know about layering up and making a quilt?! Don’t forget to check out the rest of the posts in this introduction to quilting series;
- Introduction to #QuiltingTheory
- Week 1 – Quilting Lingo
- Week 2 – Seam Allowance
- Week 3 – Fabric
- Week 4 – Essential Tools
- Week 5 – How a quilt is put together
Come back next week when we will make a start on a Mini Medallion Cushion and try some of the skills that have been covered in the previous weeks,
S x
Today’s sky::: beautiful blue skies. Spring is definitely in the air!
If you would like monthly news and updates, please sign-up to my newsletter.
To check out my quilt and accessories patterns, visit my Pattern shop.
For my favourite sewing equipment and tools, visit my Amazon store.